Resin crafts are a little bit science experiment, a little bit art project, and a whole lot of “wait… that actually worked?” joy. If you are brand new, your first win is not a flawless coaster set. It is a safe setup, a simple mold, and a small project that teaches you how resin behaves.
This guide will walk you through a beginner-friendly workspace, the supplies you actually need, the safety stuff that matters, and a first project you can finish without advanced tools.
Pick the right resin for beginners
When people say “resin,” they usually mean one of these:
- Epoxy resin (two-part): Most common for beginner crafts like keychains, jewelry, and small trays. It cures slowly, giving you time to mix and pour. Many formulas self-level nicely.
- UV resin: Cures quickly under a UV lamp or strong sunlight. Great for small, shallow projects and quick fixes, but it can be fussy in thicker pours. It can still have fumes and irritants, so it still needs gloves and good ventilation.
- Polyester resin: Common in fiberglass work and some casting. It has stronger fumes and is generally not the cozy beginner option for home crafting.
My suggestion for a first project: a beginner epoxy resin labeled for crafts and small molds. It is forgiving, widely available, and does not require a UV lamp. Just remember: low odor does not mean low risk. Some resins smell mild but can still irritate lungs or sensitize skin.
Quick buying checklist
- “2-part epoxy resin” clearly labeled with a mixing ratio.
- Mixing method: check whether the brand wants 1:1 by volume or a ratio by weight. Different lines vary, even within the same brand.
- Low viscosity or “easy pour” if you want fewer bubbles.
- Max pour depth: check the label for the maximum layer thickness. If you pour too thick, resin can overheat.
- Clear cure if you plan to embed glitter, dried flowers, or tiny charms.
Workspace setup: five stress-savers
Resin is easiest when you treat it like cooking with a very messy frosting. Everything goes smoother if you prep first.
1) Ventilation you can actually maintain
Work near an open window with a fan pulling air out if possible. If you have a garage with the door open, that is even better.
Try not to work in a bedroom or right next to where pets sleep. Resin odors can linger, especially during curing.
2) A level surface
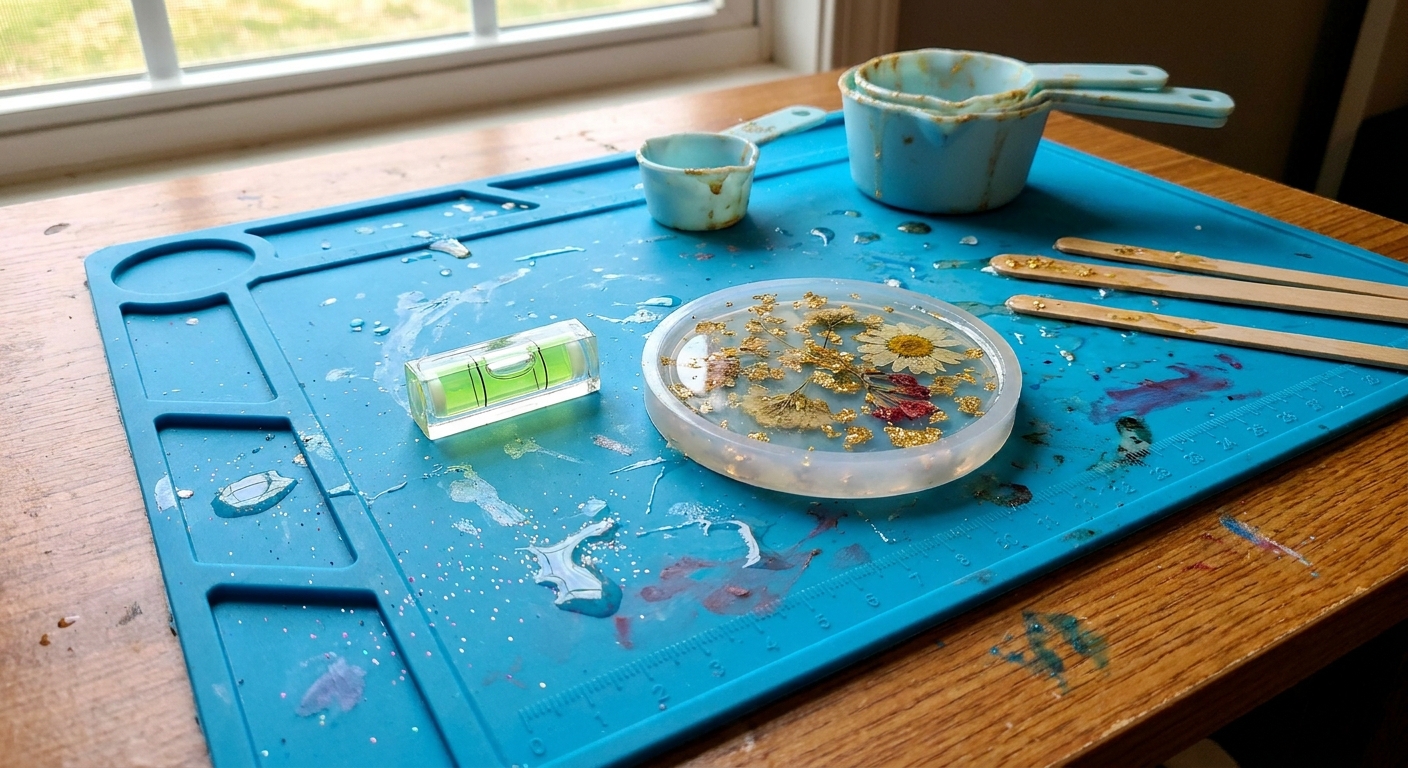
Resin self-levels. If your table tilts, your piece will cure tilted. Use a small level or a simple hack: pour a little water into a clear cup and set it on your table. Look at the waterline and notice the gap between the waterline and the rim. If the gap changes as you rotate the cup, your surface is not level. Shim with cardboard if needed.
3) Cover everything you like
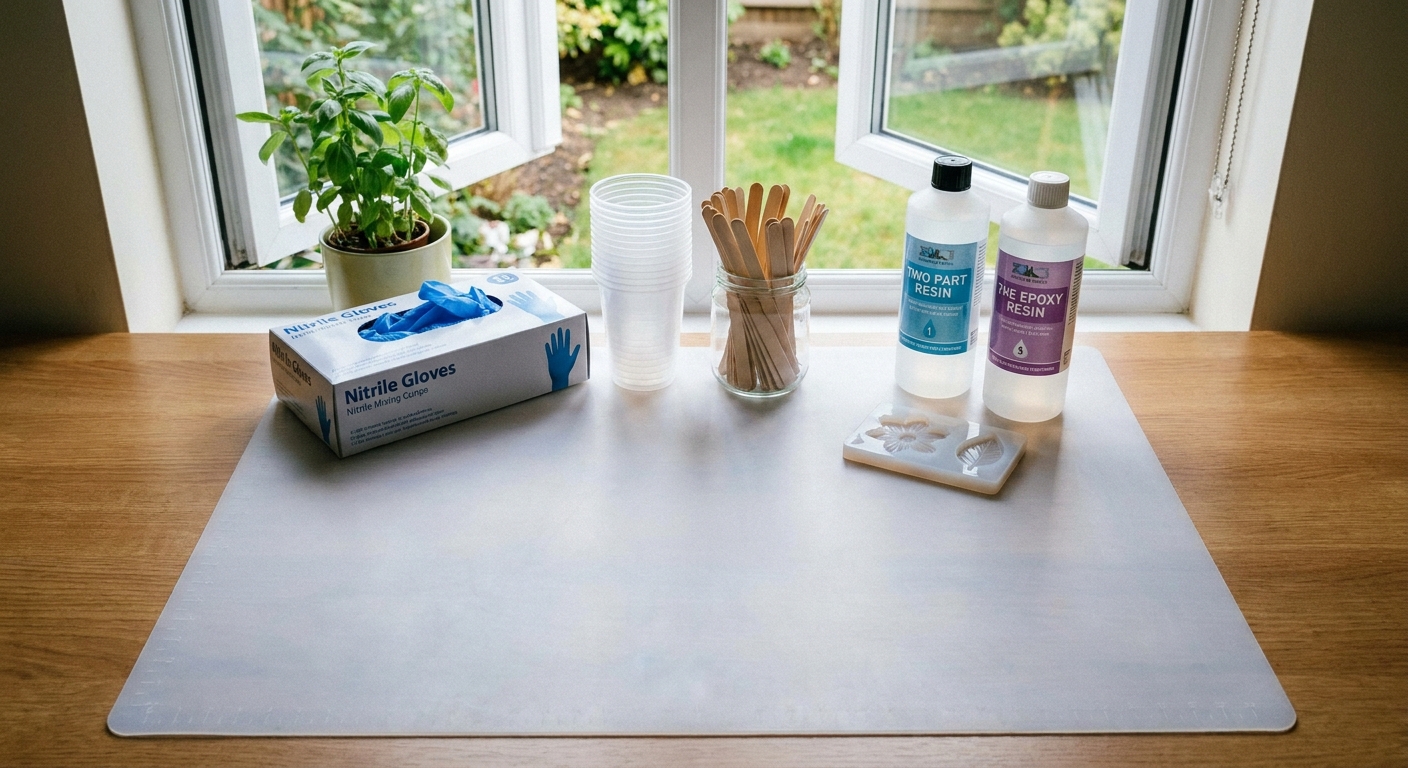
Use a silicone mat, freezer paper (shiny side up), or a plastic tablecloth. Resin drips are forever. Your future self will thank you.
4) Control dust and pet hair
Resin is a magnet for floating fuzz during curing. Before you pour:
- Wipe down your work area.
- Wear a lint-free top if you can.
- Have a clean box or plastic bin ready to tent over your project while it cures.
5) Temperature and humidity
Most craft epoxies cure best around 70 to 75°F (21 to 24°C). Colder rooms can lead to cloudy resin or sticky surfaces. Hot rooms can shorten working time and increase bubbles.
Humidity can also affect some epoxies. If your cured piece has a waxy or greasy film on top (often called amine blush), wash it with mild soap and water, let it dry fully, then sand or topcoat.
Choose a curing spot that stays flat, dust-protected, and steady in temperature. Keep curing pieces out of direct sunlight unless your resin specifically says otherwise.
Essential supplies (and what to skip)
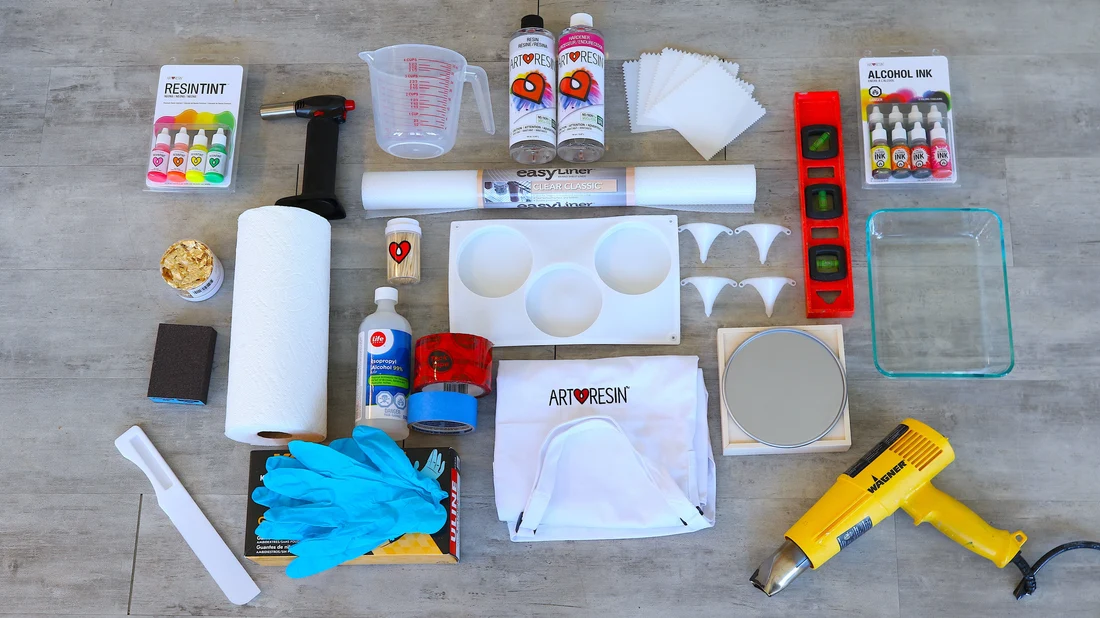
You do not need a studio full of gadgets to get started. Here is the realistic beginner list.
Must-haves
- Resin and hardener (a matched set from the same brand and line).
- Nitrile gloves (not latex or vinyl). Nitrile is generally more chemical-resistant for epoxies.
- Measuring cups with clear markings, or graduated mixing cups.
- Mixing cups (silicone cups are reusable, plastic is fine to start).
- Stir sticks (wooden craft sticks or silicone stirrers).
- Silicone mold for your project (keychain mold is perfect).
- Paper towels for quick wipe-ups.
- Isopropyl alcohol (70 to 91%) can help wipe up residue on tools and surfaces before resin cures, but follow your resin brand’s instructions and SDS. IPA is flammable, and some brands prefer different cleaners.
- Something to cover curing pieces (a clean storage bin, cardboard box, or large bowl).
Nice-to-haves (not required)
- Digital scale if your resin uses weight ratios or you want extra accuracy.
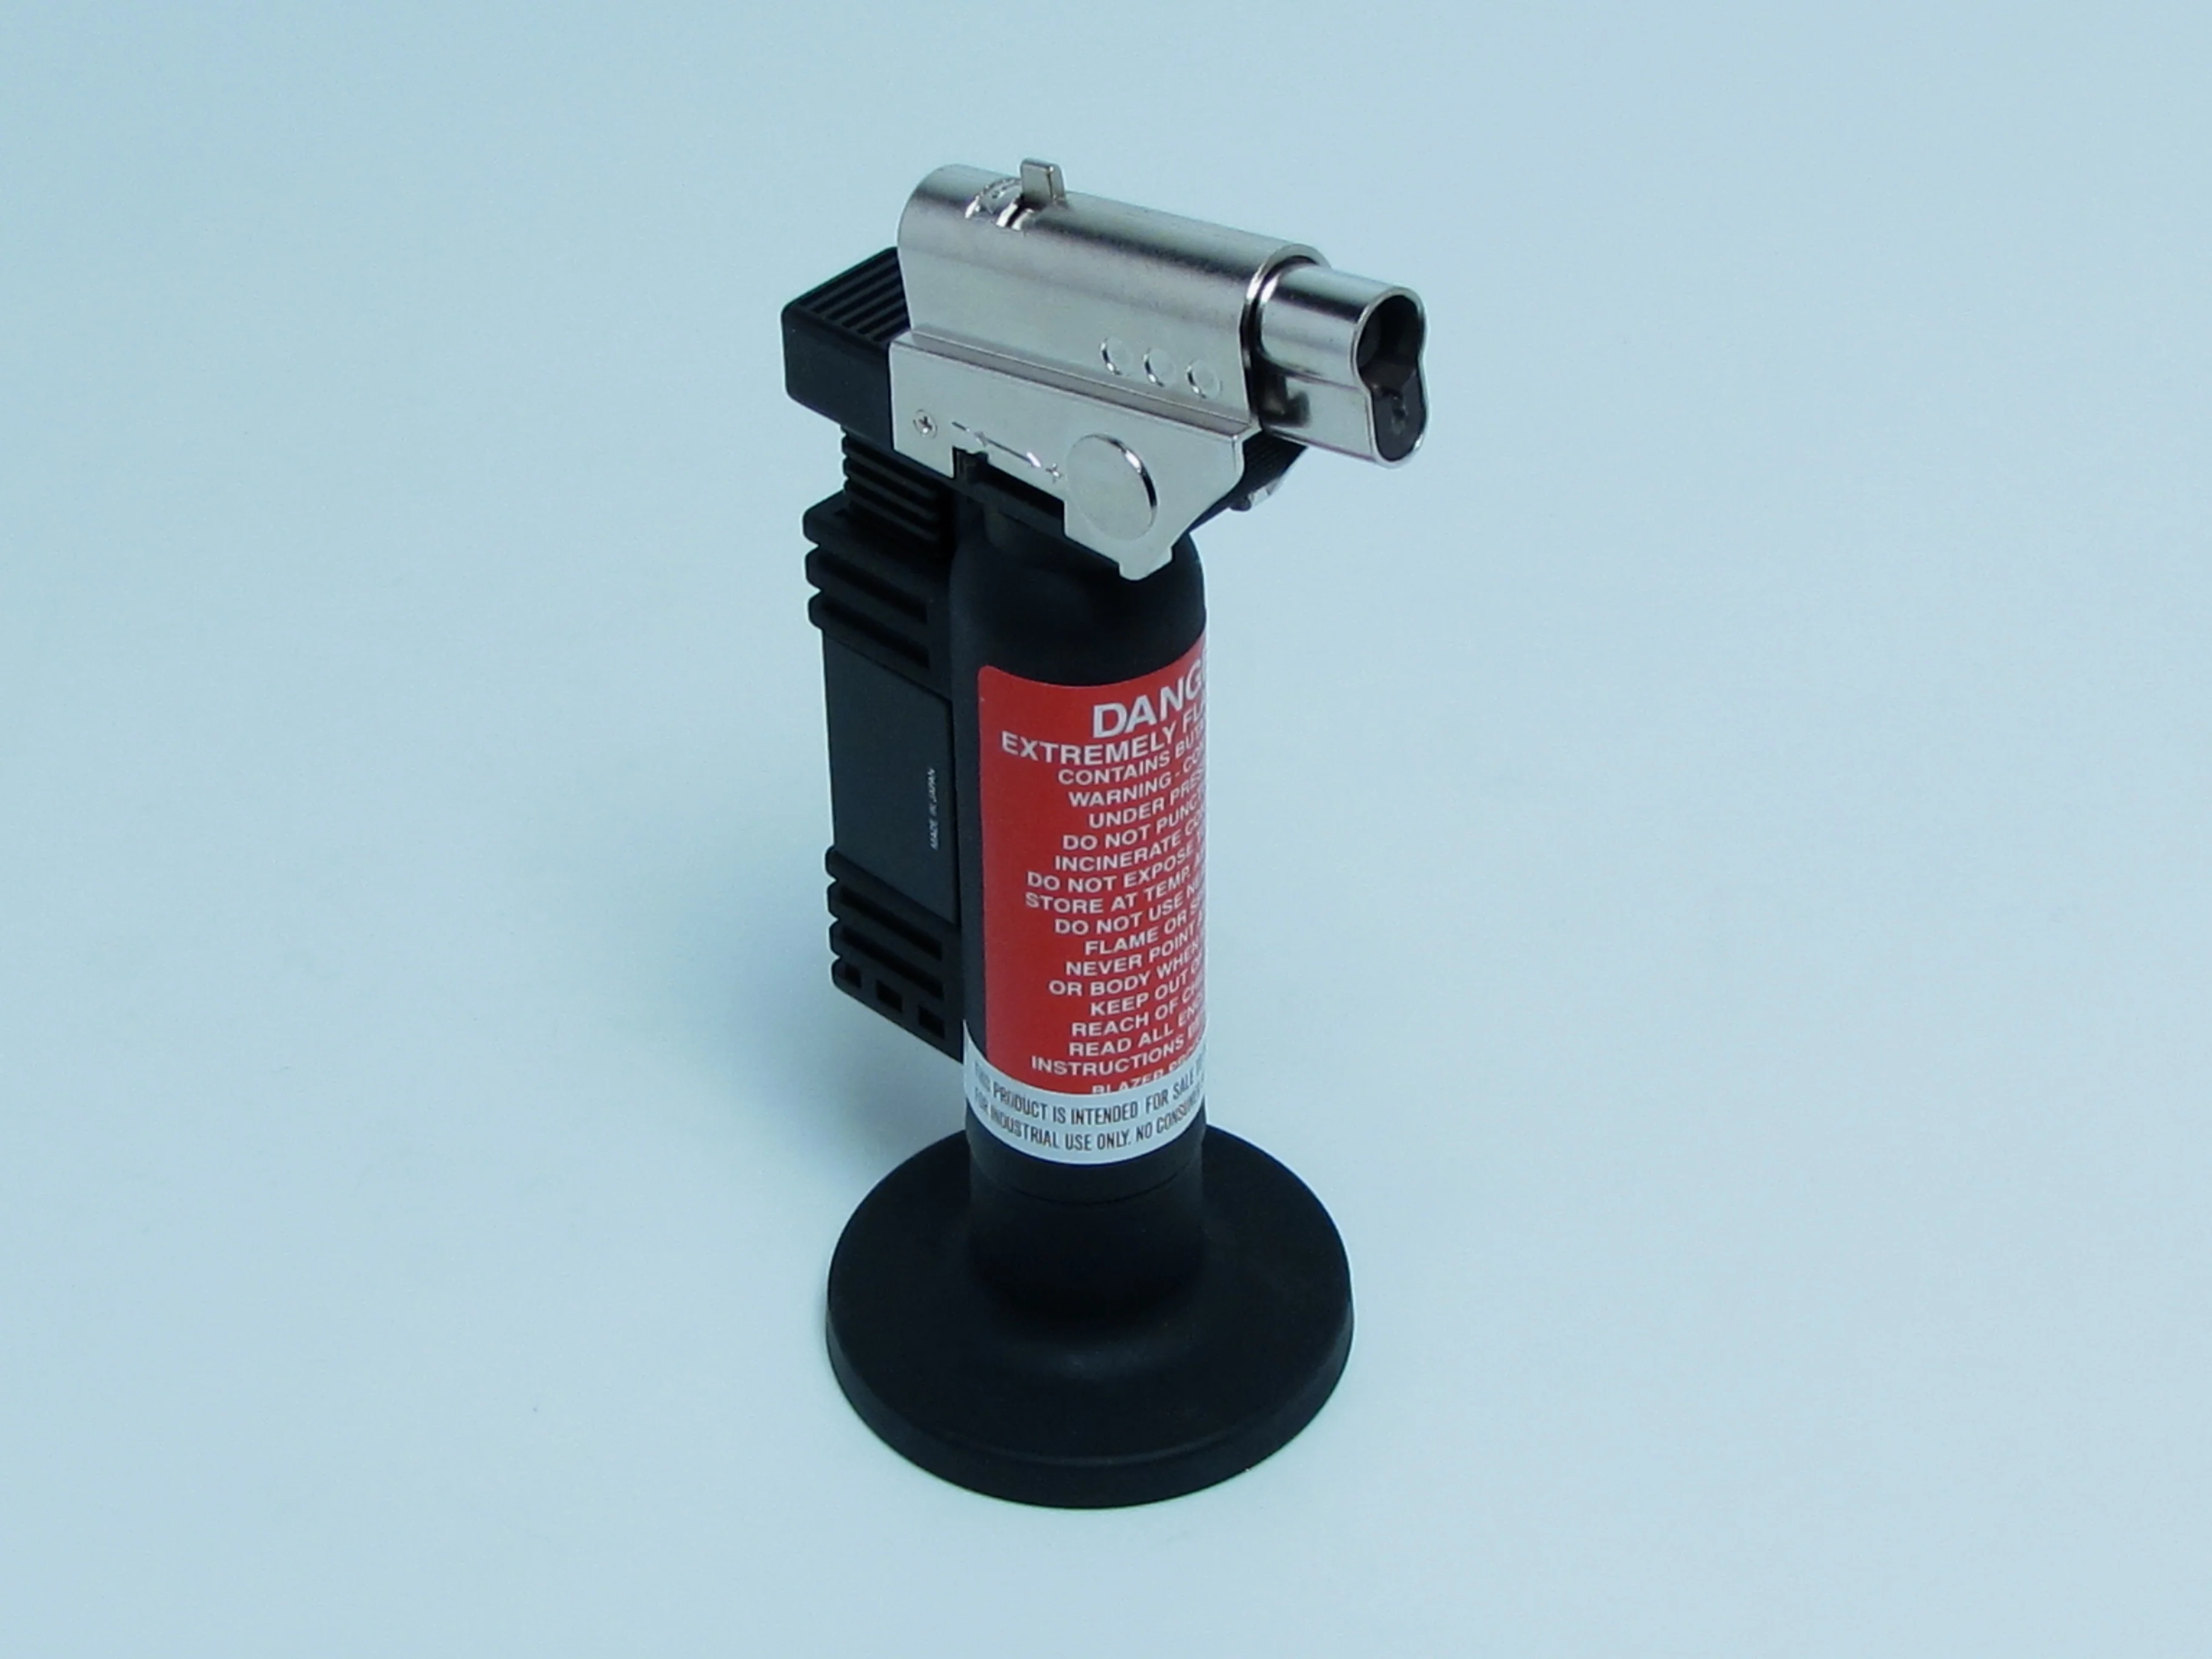
- Heat gun or mini torch for popping bubbles. A hair dryer on low can work in a pinch, but it can blow dust into your resin.
- Pigments like mica powder, resin dye, or alcohol ink.
- Silicone tweezers for placing tiny embeds.
- Small sanding kit (wet/dry sandpaper and a nail buffer are great starter options).
What to skip for your first attempt
- Big deep-pour projects like thick paperweights or river-table style pours.
- Large molds that waste resin while you are still learning to measure and mix.
- Extra-fast cure formulas that give you very little working time.
Resin safety: the non-negotiables
I am all for playful crafting. I am also all for keeping your lungs, skin, and countertops happy long-term.
Read the label (and the SDS)
Your resin’s instructions and SDS will tell you the correct ratio, cure times, pour limits, and recommended safety gear. It is the least exciting part of resin crafting, which is exactly why it matters.
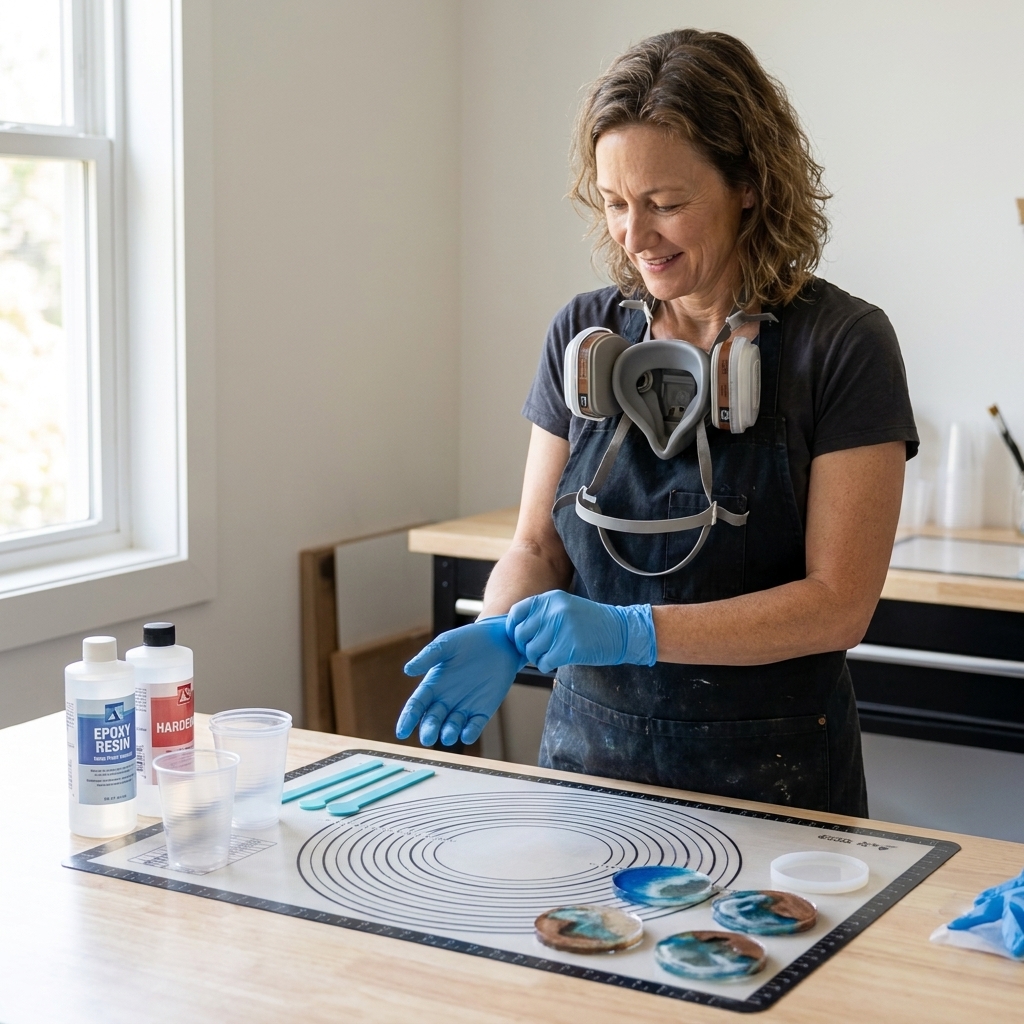
Wear the right protection
- Gloves: Nitrile gloves every time. If resin gets on your skin, wipe it off right away with paper towels, then wash with soap and water. Do not use solvents on skin.
- Eye protection: Safety glasses are smart, especially when stirring vigorously or using a heat tool.
- Respirator: If you are working indoors, doing resin often, or you notice strong odor, consider a proper respirator with organic vapor cartridges. Dust masks are for particles, not fumes.
Food and resin do not mix
Do not use your kitchen utensils, cups, or stirring tools for resin. Keep a separate resin-only kit.
Heat happens
Resin can get hot as it cures, especially in thick pours or large volumes. Avoid mixing huge batches in one cup, and do not pour thick layers unless your resin is designed for it.
Clean up and disposal
- Uncured resin is a chemical waste issue, so do not pour it down the sink.
- Let leftover resin in your mixing cup cure fully, then peel it out and dispose of it according to your local guidelines.
- Wipe up spills while resin is still wet using paper towels. Use cleaners only as recommended by your resin brand and SDS.
Beginner mantra: Odor is not a safety meter. If you can smell it strongly, improve ventilation and consider upgrading your protective gear. “Just one quick pour” still counts.
Your first project: a simple resin keychain
This project is small, inexpensive, and teaches you the big three skills: accurate measuring, thorough mixing, and patient curing.
What you will need
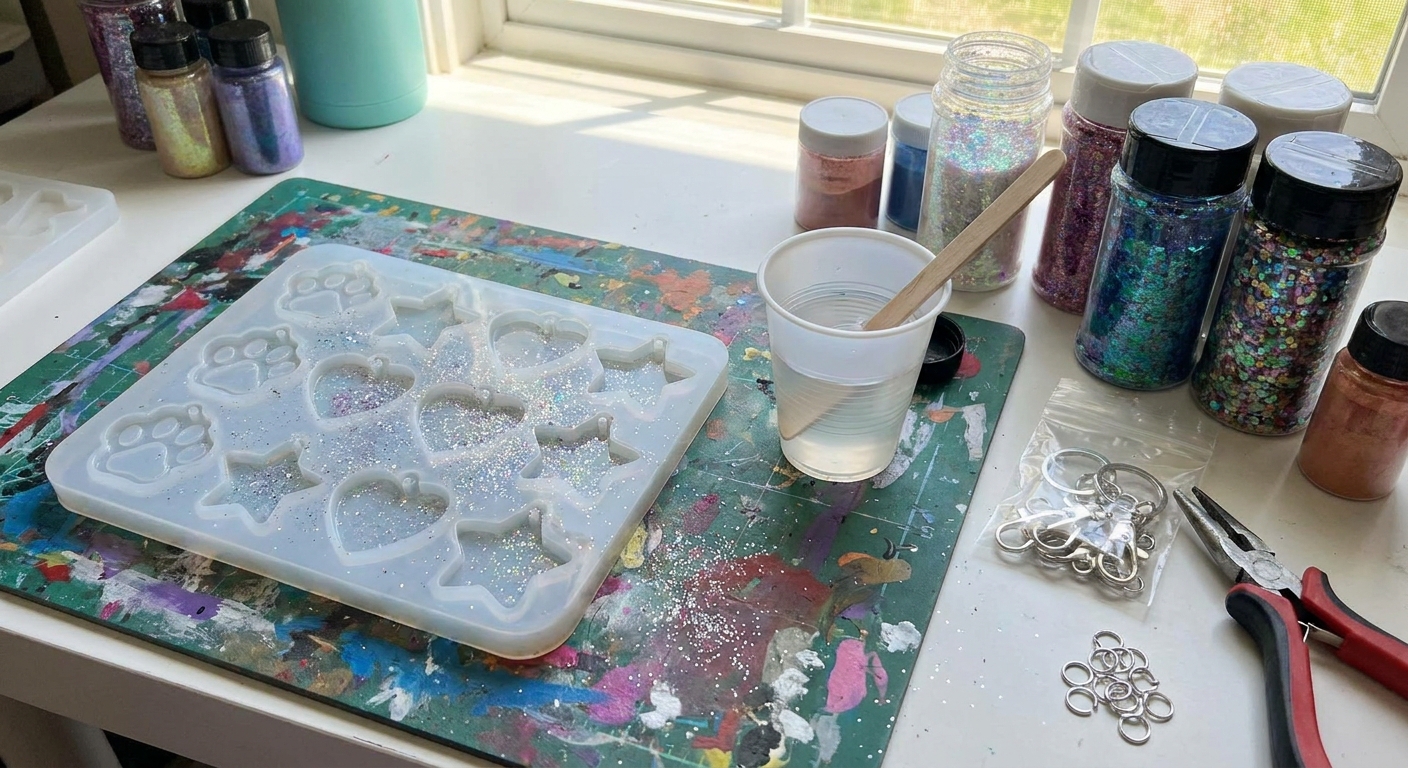
- Small silicone keychain mold
- Two-part epoxy resin (beginner craft formula)
- Nitrile gloves
- Measuring cup, mixing cup, and stir stick
- A tiny amount of glitter or mica (optional)
- Keychain hardware (screw eye pin, jump ring, and keyring), or a mold with a built-in hole
- Toothpick for detail work
- Paper towels (and cleaner per your resin brand guidance)
- A box or bin to cover while curing
Step 1: Prep your mold and workspace
Place your mold on a flat surface covered with a silicone mat or freezer paper. Set out everything you need. Once resin is mixed, you do not want to rummage through drawers with sticky gloves.
If your mold is dusty, rinse it with water, dry thoroughly, and wipe with a lint-free cloth. Water droplets can cause cloudy spots.
Step 2: Measure precisely
Check your resin instructions for the correct ratio and whether it is by volume or by weight.
- Pour Part A into your measuring cup.
- Pour Part B into the same cup to match the amount (or weigh parts if your resin calls for weight).
Tip: For a keychain, you usually need only a small amount. Mixing too much creates more heat and more waste.
Step 3: Mix slowly and thoroughly
Stir for the full time listed on the label, often 3 to 5 minutes. Scrape the sides and bottom as you mix.
You are aiming for fully blended resin, not whipped resin. Stirring slowly reduces bubbles.
If your resin instructions recommend a “double cup” method, do it. After mixing, pour into a second clean cup and stir again for another minute. This helps prevent sticky spots from unmixed resin clinging to the sides.
Step 4: Add color or sparkle (optional)
Add a tiny amount of pigment. With resin colorants, a little goes a long way.
- Mica powder: start with a toothpick tip amount.
- Glitter: fine glitter suspends better in small pieces than chunky glitter.
Mix gently until you like the look.
Step 5: Pour slowly
Pour slowly into the mold. If your mold has sharp corners, use a toothpick to coax resin into the edges.
See bubbles? Let the resin sit for a minute, then:
- Tap the mold lightly on the table.
- Run a heat gun briefly over the surface from a distance. Think “warm breeze,” not “blast furnace.”
If your resin allows layered pours, you can also pour in thinner layers to reduce heat and bubbles. Always follow the label’s max pour depth.
Step 6: Cover and let it cure
Cover your mold with a clean box or bin to keep dust out. Then walk away. Truly. Hovering is how we all end up poking it “just to see.”
Cure time varies by brand and room conditions. Many craft epoxies need 12 to 24 hours before demolding and 48 to 72 hours for a full hard cure, but your resin’s label is the boss here.
Step 7: Demold and finish
Once the piece feels firm and no longer tacky:
- Flex the silicone mold gently to release the keychain.
- If there are rough edges, sand lightly with wet/dry sandpaper (start around 400 to 800 grit) and finish with a nail buffer.
If you notice a waxy film on the surface, wash with mild soap and water first, dry fully, then sand or topcoat.
Step 8: Add hardware
If your mold includes a built-in hole, you can add a jump ring and keyring right away.
If your mold does not have a hole, you have two beginner-friendly options:
- Screw eye pin: Carefully twist a small screw eye into the cured resin. For extra security, add a tiny dab of mixed epoxy (or a compatible two-part epoxy glue) on the threads before inserting, then let it cure fully before tug-testing.
- Glue-on bail: Use a strong jewelry adhesive that is compatible with resin, and let it cure fully before tug-testing.
Common beginner mistakes (and easy fixes)
“My resin is still sticky”
- Most likely: inaccurate measuring, incomplete mixing, or a room that is too cold.
- Try: give it more time in a warm, stable spot. If it is still tacky after the brand’s full cure window, it may not fully cure. For small pieces, you can sometimes seal the surface with a thin, correctly mixed top coat, but the best fix is dialing in your measure-and-mix rhythm for next time.
“It cured with lots of bubbles”
- Most likely: fast stirring, cold resin, or pouring too quickly.
- Try: warm the sealed resin bottles in a bowl of warm water for 5 to 10 minutes before mixing (keep caps on, do not overheat). Stir slower and pour in a thin stream.
“It looks cloudy”
- Most likely: moisture, a cold workspace, or incompatible additives.
- Try: ensure molds are completely dry, craft in the recommended temperature range, and use pigments made for resin.
“My glitter sank”
- Most likely: glitter is heavy or resin is very thin early on.
- Try: pour in two stages. Let the first pour thicken slightly, then add glittery resin on top. Fine glitter also suspends better than chunky pieces.
“It got hot in the cup”
- Most likely: batch was too large in one container.
- Try: mix smaller batches and pour promptly into the mold so heat can dissipate.
Beginner-friendly upgrades
If you enjoy your first keychain, here are the next purchases that actually make the hobby smoother:
- Silicone mixing cups and stir tools for easy peel-out cleanup.
- A respirator with organic vapor cartridges if you craft regularly.
- A pressure pot (later) if you move into crystal-clear castings and want bubble-free results. Not needed for your first steps.
- Quality pigments like resin dyes and mica sets for consistent color.
- More small molds: stud earrings, bookmark molds, mini trays.
FAQ
Is resin safe to use at home?
It can be used at home if you take precautions: good ventilation, gloves, careful measuring, and safe curing away from kids and pets. If you are sensitive to odor or craft frequently, a respirator with organic vapor cartridges is a smart upgrade. Also, keep in mind that mild smell does not equal mild exposure.
Do I need a UV lamp to start?
No. UV lamps are for UV resin. Two-part epoxy resin cures on its own over time and is generally easier for a first project.
Can I use resin in silicone baking molds?
Use molds dedicated to crafting. Even if a baking mold seems similar, you do not want resin contact on anything that might return to food use.
How do I keep dust off while it cures?
Tent your piece under a clean plastic bin, cardboard box, or large bowl. Just make sure it does not touch the resin surface.
What is the easiest first resin project?
A small keychain, pendant, or pair of simple studs. Small molds teach the basics without wasting materials, and you get something fun and usable at the end.
One last pep talk from a former librarian
Resin rewards the calm, prepared version of you. Set up first, measure carefully, mix longer than you think you need to, then let the cure do its quiet magic. Your first keychain does not need to be perfect. It just needs to exist, sparkle a little, and remind you that beginners are allowed to make wonderfully imperfect things.