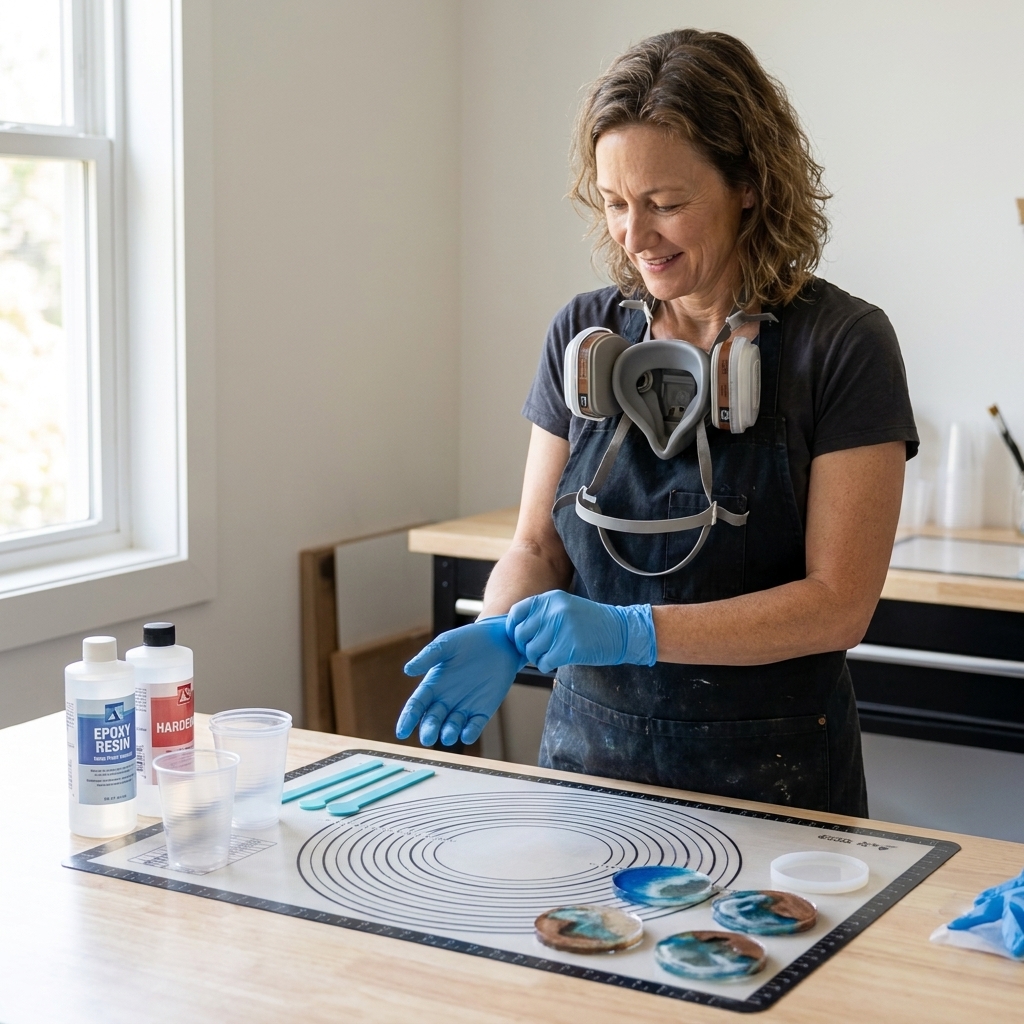
Resin art has a magical reputation, and honestly, it earns it. You pour a clear liquid, swirl in a little color, and a day later you have something glossy and solid that looks like it came from a boutique. The not-so-magical part is that resin is also a chemical process, which means your first win is not a perfect pour. Your first win is a safe setup and a calm, repeatable routine.
Think of this as your friendly on-ramp. We will cover what you truly need, how to prep your workspace, how to mix and pour without panic, and a simple first project that becomes a usable set of coasters.
Resin basics in plain English
Most beginner resin art uses two-part epoxy resin: Part A (resin) and Part B (hardener). When mixed in the correct ratio, they react and cure into a hard plastic-like surface.
- Working time: How long you have to mix and pour before it thickens. Many beginner epoxies give you 30 to 45 minutes.
- Cure time: When it is solid enough to handle. Often 12 to 24 hours.
- Full cure: When it reaches maximum hardness. Commonly 72 hours to 7 days.
For a first project, choose an epoxy labeled for art or casting (not deep industrial pours unless you know what you are doing). A “1:1 by volume” art epoxy is the easiest on-ramp.
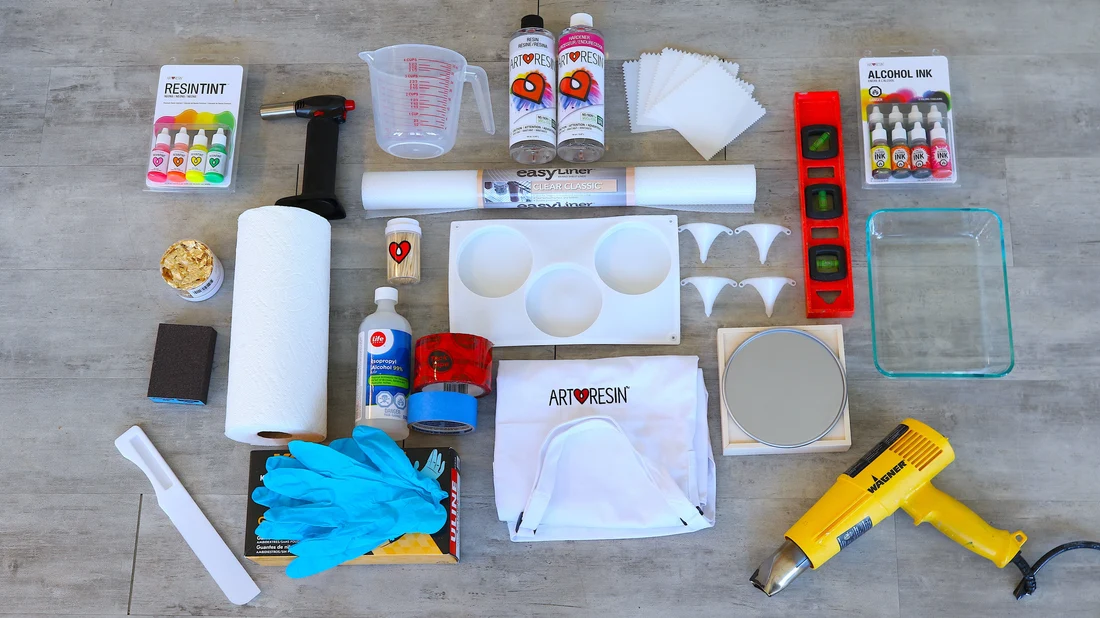
Beginner supply checklist (what you need and what can wait)
Must-haves for a first project
- Two-part epoxy resin kit (read the label for mix ratio, cure time, and safety notes)
- Nitrile gloves (not latex; resin can permeate some materials)
- Respiratory protection: Follow your product label and SDS. Many makers rely on strong ventilation and careful skin protection for epoxy, but if your brand recommends a respirator (or you are working indoors), use a properly fitted NIOSH-approved half-face respirator. Depending on your exposure, that may mean organic vapor (OV) cartridges or OV/P100 combination cartridges. A dust mask is not adequate for vapors.
- Eye protection (simple safety glasses)
- Mixing cups with clear measurement marks (use new cups or dedicated resin cups only)
- Stir sticks (wood or silicone)
- Silicone molds (coaster molds are perfect for first timers)
- Level surface and a small level (this matters more than you think)
- Protective covering for your table (plastic sheeting, freezer paper shiny side up, or a silicone mat)
- Isopropyl alcohol (91% or higher) and paper towels for cleanup while resin is still wet (for surfaces and tools, not skin)
Nice-to-haves (helpful, not required)
- Digital kitchen scale (especially useful if your resin is “by weight”)
- Heat tool (embossing heat gun) or a small torch designed for crafts to pop surface bubbles
- Silicone mixing cup (reusable, peels clean when cured)
- Pigments: mica powder, resin dye, or pigment paste made for resin
- Disposable pipettes for controlled color drops
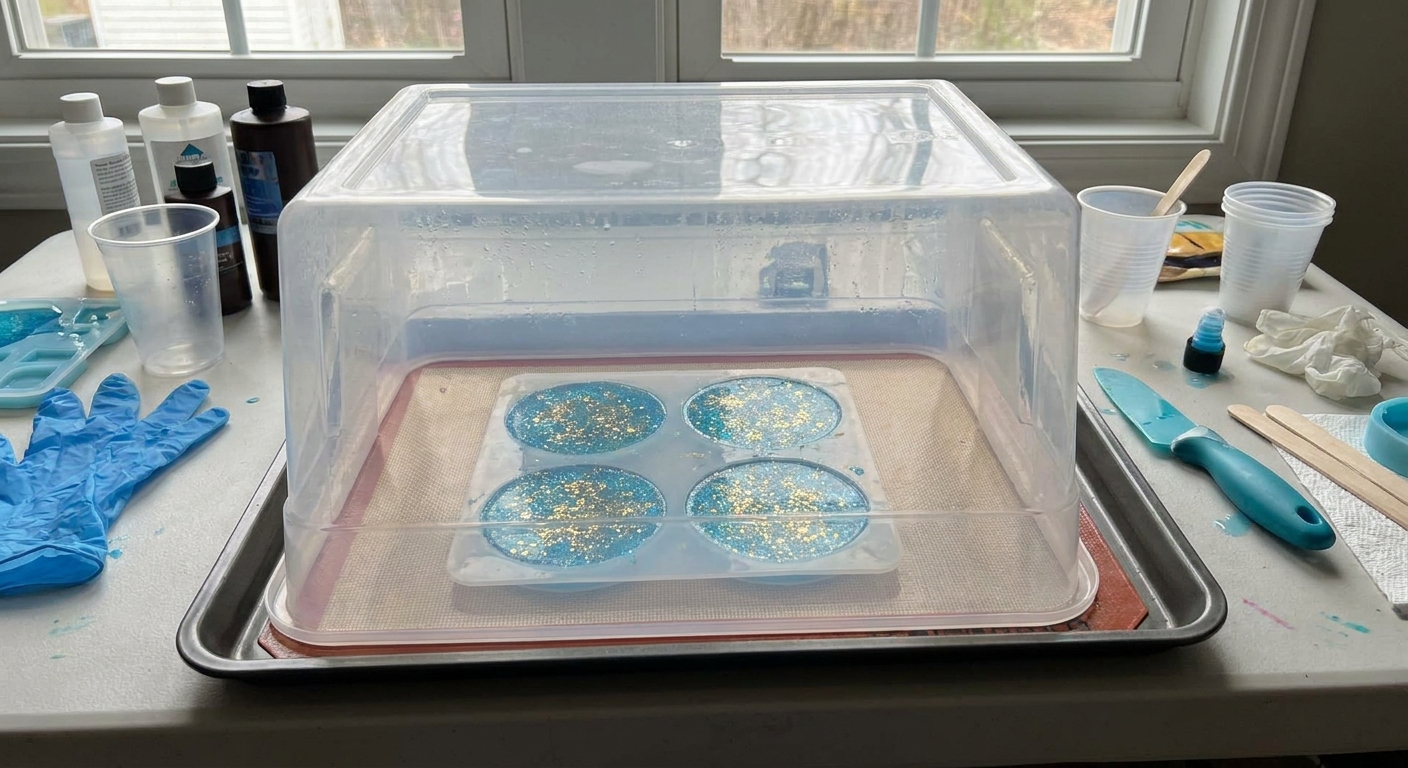
- Dust cover (a clean plastic storage bin turned upside down works beautifully)
- Particulate protection for sanding: If you sand cured resin, wear a P100-rated mask or respirator filter and keep dust under control.
Beginner tip: Buy less color than you think. Resin projects use tiny amounts of pigment. One or two mica powders plus a white and a black tint can carry you far.
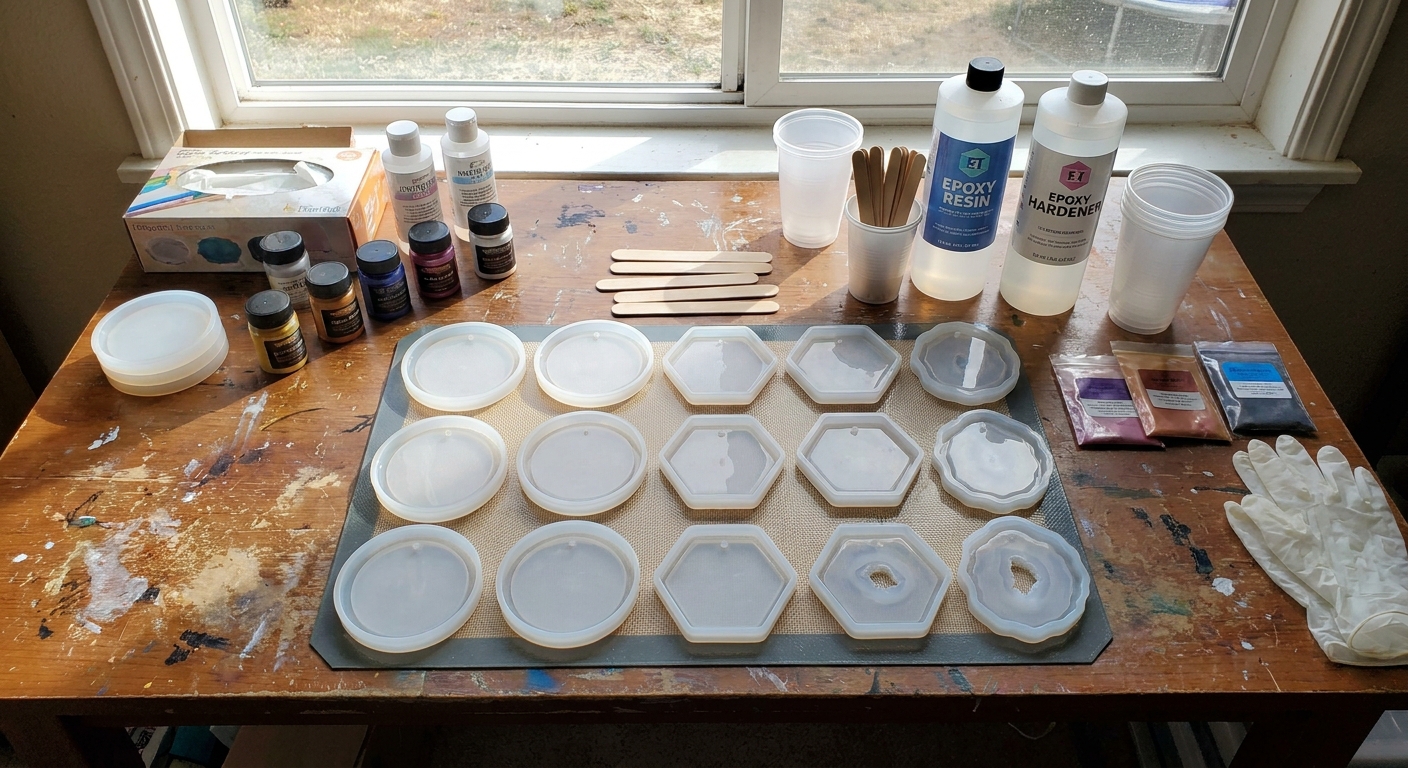
Workspace setup: safe, calm, and easy to clean
As a former librarian, I am contractually obligated to love an organized workspace. Resin rewards that energy. Before you open the bottles, set up four zones: protection, mixing, pouring, and curing.
Ventilation and location
- Best option: Work outdoors in dry weather, shaded from direct sun.
- Good indoor option: Near an open window with a fan pulling air out (exhaust). Keep pets and kids out of the room.
- Temperature matters: Check your label. Many epoxies cure best around 72 to 78°F (22 to 26°C). Too cold equals thick resin and bubbles. Too warm equals fast curing and surprise panic.
- Humidity matters: If you live somewhere humid, moisture can cause cloudiness or a waxy surface film (often called amine blush) on some epoxies. When possible, aim for a drier day, keep your workspace closed up, and let pieces cure under a cover.
Surface protection
- Cover the table fully. Resin finds the one uncovered inch like it is personally offended.
- Set molds on a rigid tray you can move without wobbling.
- Use a small level to confirm your surface is actually level. A slight tilt can turn your “modern marble coaster” into a “resin landslide.”
Safety gear that actually helps
- Gloves: Wear nitrile gloves the whole time. Change them if you get resin on them.
- Respirator: If your brand recommends one, use a properly fitted NIOSH respirator and the cartridge type listed in the SDS or instructions. Replace cartridges as recommended and store them properly.
- Clothes: Long sleeves you do not love. Resin does not wash out.
A quick note on sensitization
Epoxy can cause sensitization, which is a fancy way of saying your body can decide one day that resin is now a problem, and it may stay a problem. The best prevention is boring but effective: avoid skin contact, keep your workspace clean, and do not “just wipe it off and keep going.”
Make a curing spot
Resin cures sticky at first and acts like a dust magnet. Prepare a spot where your pieces can sit undisturbed under a cover.
- Use a clean plastic bin, large bowl, or cake carrier as a dust cover.
- Keep it away from vents, open windows blowing pollen, and curious paws.
How to mix and pour resin (the beginner-proof method)
The main reason resin fails is not bad luck. It is usually wrong ratio or incomplete mixing. Slow down here and you will save yourself hours of sticky regret.
Step 1: Read your label and SDS
Resins vary. Some are 1:1 by volume, some 2:1 by volume, and some require measuring by weight. Use the method your specific brand requires, and follow any safety guidance from the manufacturer.
Step 2: Warm the bottles if your room is cool
Thick resin traps bubbles. If needed, set sealed bottles in a warm water bath for 5 to 10 minutes, then dry the bottles completely before opening. Keep water away from your resin and tools.
Step 3: Measure carefully
- Use separate measuring cups for Part A and Part B if possible.
- Pour slowly to avoid adding bubbles.
- Measure at eye level for accuracy.
Step 4: Mix slowly and thoroughly
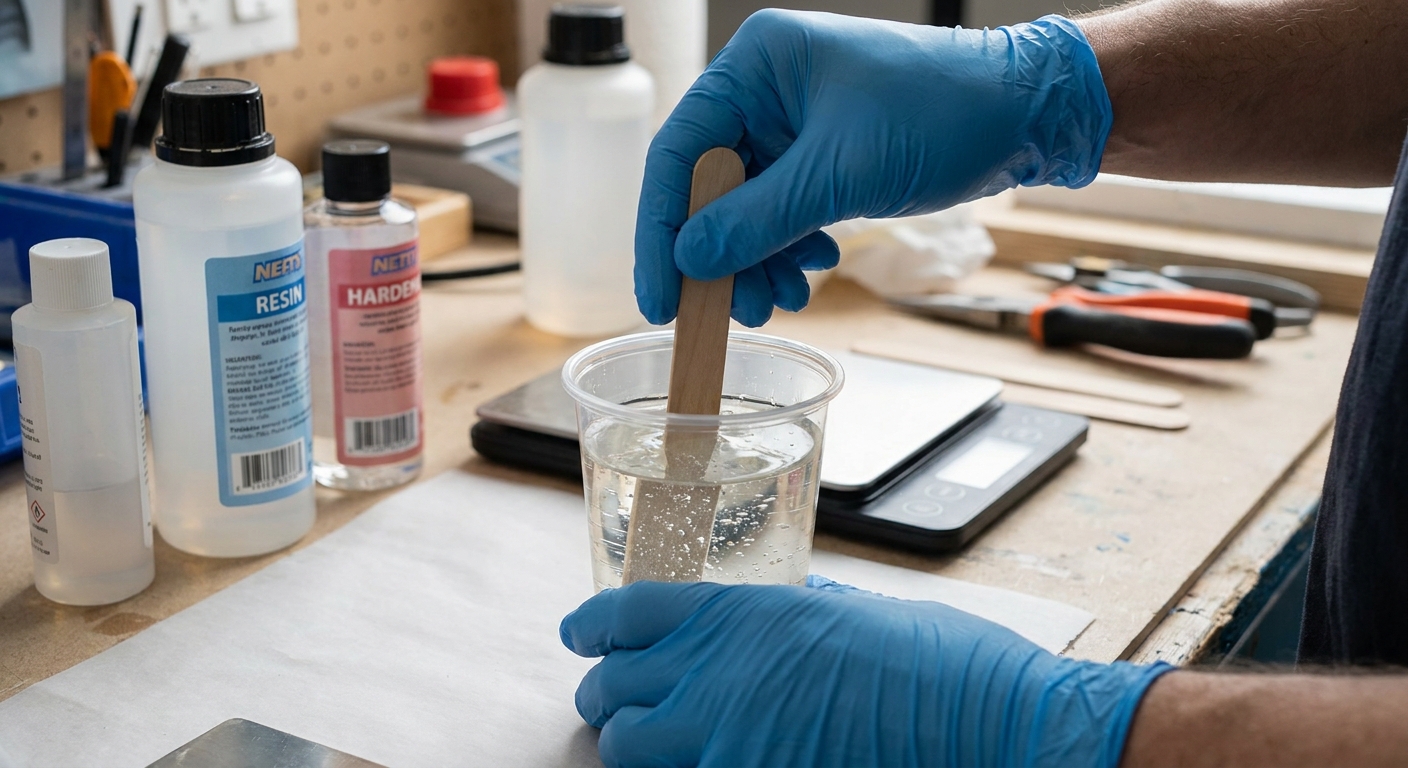
Combine Parts A and B as directed by your brand. Stir slowly for the recommended time, usually 3 to 5 minutes. Scrape the sides and bottom as you stir.
Pro move: After mixing, pour the resin into a second clean cup and mix for another 30 to 60 seconds. This “double cup” method reduces sticky spots caused by unmixed resin clinging to the first cup’s walls.
Step 5: Add color sparingly
Add pigments a tiny bit at a time. Too much liquid color can interfere with curing. If you want opaque, look for pigments made for resin or use a small amount of white resin pigment paste.
Step 6: Pour and monitor for a few minutes
- Pour into molds slowly, letting resin flow into corners.
- Pop bubbles by gently passing a heat gun over the surface for a second or two. Keep heat moving. Too much heat can warp molds or cause ripples.
- Check again after 5 minutes. More bubbles often rise after the initial pour.
A simple first project: two-color swirl coasters
This project is my favorite “first resin win” because it is small, forgiving, and ends with something you can use or gift. You will make a set of coasters with a simple swirl effect.
What you need
- Silicone coaster mold (4 cavities is great)
- Epoxy resin (1:1 by volume is easiest)
- Two mica powders or resin dyes (example: pearl white and teal)
- Mixing cups, stir sticks, gloves, respirator (if recommended for your setup), safety glasses
- Optional: gold foil flakes for a fancy moment
How much resin to mix
Mold sizes vary a lot, so instead of guessing ounces, do this once and you will never have to stress again:
- Fill one mold cavity with water all the way to the line you plan to pour.
- Pour that water into a measuring cup to see the volume.
- Multiply by the number of cavities, then mix a little extra (about 10 percent) so you are not scraping the cup at the end.
As a rough reference, many typical 4 inch (10 cm) coaster molds land around 1 to 2 oz (30 to 60 ml) per coaster, depending on thickness and design.
Step-by-step
- Prep your space: Cover the table, level your tray, set up your dust cover, and put on gloves and eye protection. Add a respirator if your brand or setup calls for it.
- Prep your mold: Make sure it is clean and dry. Dust or moisture can show up as surface flaws.
- Measure resin: Use the water-volume method above, then measure Parts A and B exactly as directed.
- Mix thoroughly: Stir slowly, scrape the sides and bottom, then use the double cup method.
- Split into two cups: Divide the mixed resin into two smaller cups.
- Color each cup: Add a tiny amount of mica or dye to each, stirring gently until you like the shade.
- Pour base layer: Pour one color into each cavity to cover the bottom.
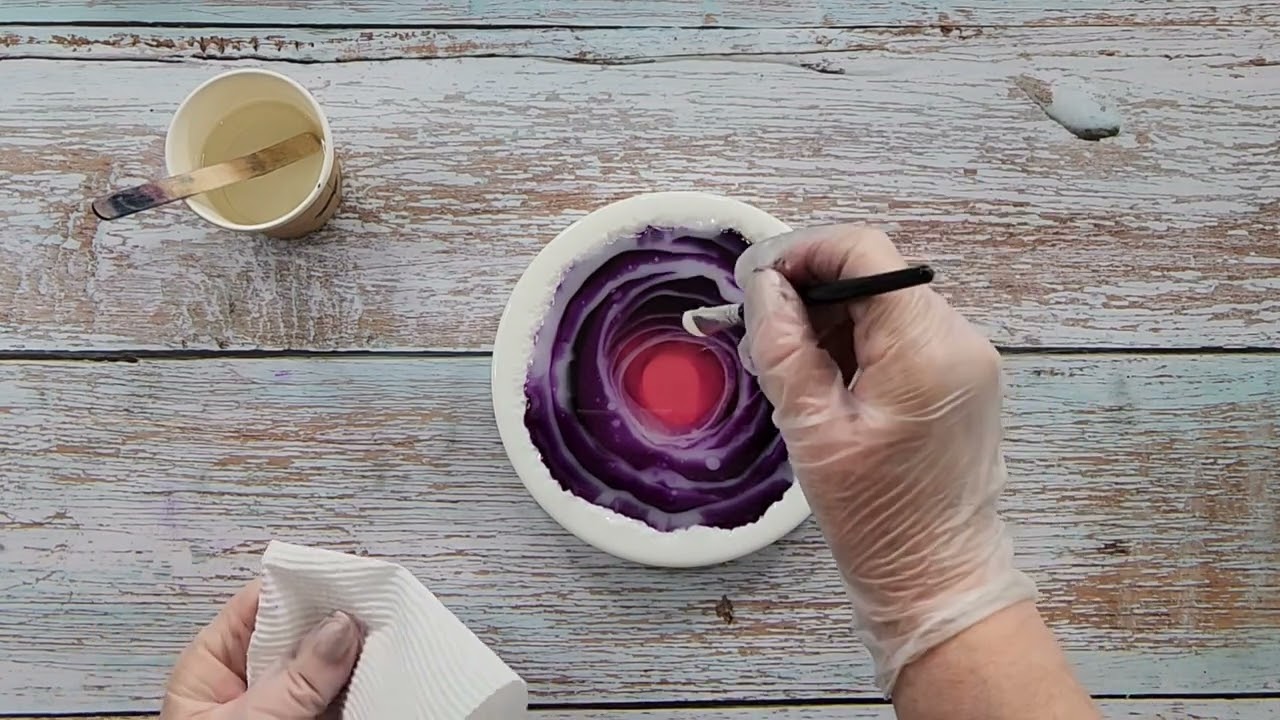
- Add swirl color: Pour the second color in a thin stream in a spiral or S-shape.
- Swirl gently: Use a toothpick or stir stick to make 2 to 3 slow figure-eight motions. Stop early. Over-swirling turns everything into one color.
- Bubble check: Quick pass with gentle heat, then check again after a few minutes.
- Cover and cure: Place your dust cover over the mold and let it cure on a level surface for the full time listed on your resin.
- Demold: Once fully hard, flex the mold and pop out the coasters.
- Wait for full cure: If your resin needs several days for full hardness, treat your coasters gently until then.
Common beginner mistakes (and how to avoid them)
1) Sticky or bendy resin
Usually caused by: wrong ratio, poor mixing, or cold temperatures.
- Measure carefully and use the correct method (by volume vs by weight).
- Mix for the full time, scraping sides and bottom.
- Try the double cup method.
- Cure in the recommended temperature range.
If it is still tacky after 24 hours
- Do not topcoat it yet. Uncured resin under a fresh layer stays a problem.
- Give it more time in the correct temperature range, especially if your room is cool.
- If it is still soft or wet after the full cure window on your label, it is usually a mix or ratio issue. The most reliable fix is often to remove what you can (scrape while wearing gloves), clean the mold, and repour with a carefully measured batch.
2) Lots of bubbles
Usually caused by: stirring too fast, cold thick resin, or pouring from too high.
- Warm resin bottles gently if needed.
- Stir slowly like you are making fancy hot chocolate, not whisking eggs.
- Pour low and slow.
- Use brief, gentle heat to pop surface bubbles.
3) Dust, hair, or mystery fuzz in the finish
Usually caused by: curing uncovered or near airflow.
- Use a dust cover every time.
- Avoid curing near vents or open windows.
4) Cloudiness or a waxy film
Usually caused by: moisture, high humidity, or temperature swings (some epoxies are more sensitive than others).
- Cure in a stable, label-recommended temperature range.
- Use a dust cover and avoid damp air when possible.
- If your resin mentions amine blush in its documentation, follow the manufacturer’s cleanup guidance before sanding or topcoating.
5) Warping or ripples
Usually caused by: too much heat from a torch or heat gun, or curing too hot.
- Use quick passes of heat, keep it moving.
- Do not cure in direct sun.
6) Resin stuck in the mold details
Usually caused by: demolding too soon.
- Give it more time. Resin is a slow hobby pretending to be fast.
Cleanup and disposal (please do not pour resin down the sink)
- Wipe up spills immediately with paper towels and isopropyl alcohol while resin is still wet. Use alcohol on surfaces and tools, not on skin.
- Let leftover mixed resin cure in the cup. Once hardened, you can usually dispose of it in household trash, but check your local rules.
- Do not pour resin, hardener, or alcohol-resin sludge down drains.
- Tools: Silicone tools peel clean once cured. Disposable tools are often easiest for a first project.
Quick safety FAQ
Is resin safe to use at home?
It can be used at home if you take it seriously: ventilate well, wear nitrile gloves, and follow your product label and SDS. Keep it away from kids and pets, and cure projects in a protected area.
Do I really need a respirator?
It depends on your brand and your setup. Many manufacturers prioritize ventilation and strict skin protection for epoxy, while others recommend respiratory protection in certain conditions. If a respirator is recommended, use a properly fitted NIOSH respirator and the cartridge type specified (often OV, or OV/P100 depending on exposure). A dust mask does not filter chemical vapors, but particulate-rated filters (like P100) are useful for sanding cured resin dust.
What if I get resin on my skin?
Wipe off immediately with a dry paper towel, then wash with soap and cool water. Avoid using solvents like acetone or alcohol on skin. If you develop a rash or irritation, stop using resin and consult a professional.
Can I use food molds or kitchen tools?
No. Keep resin tools dedicated to resin only. Do not reuse anything for food.
Is resin food-safe?
For beginners, the simplest rule is: assume resin is not for food contact. Some products make specific claims after full cure, but it is nuanced and easy to get wrong. Coasters, trays for keys, and decor are great first projects. Save food-contact items for later, and only if your resin is explicitly rated for it and used exactly as directed.
Your first resin routine (a simple checklist)
- Ventilate, cover surfaces, level the tray.
- Put on gloves and eye protection, and use respiratory protection as directed for your setup.
- Set up molds on a tray and prepare a dust cover.
- Measure accurately.
- Mix slowly, scrape sides and bottom, then double cup.
- Color lightly, pour slowly, pop bubbles gently.
- Cover, cure, and do not poke it “just to see.”
If you follow that list, you are already ahead of where most of us started. Your first resin project does not have to be flawless to be satisfying. It just has to cure properly and make you want to try again.